To say in a raspy, somewhat muffled voice: The pit of despair...
If you're not a fan of The Princess Bride
the aforementioned reference means nothing to you (and there is something seriously wrong with you.) However, it was the above quote I would hear in my head every time I dared to venture into my closet. It was this dark, depressing cave of clothes I never wore, shoes stacked in corners, sweatshirts spilling off the top shelves and poor hubby's ties buried beneath my mountain of belts and scarves. It reminded me of the dark, clearance corner of a department store. Seriously, that place creeps me out and makes me sad. All of these clothes, forgotten, and destined to end up on a sad 75% off rack near the elevator in a Dillard's never to be worn and appreciated. I digress. Anyway, my closet had become such a place and I began to wear only 10% of what I owned because it was just too taxing to try and find anything. Or worse, find it and realize it doesn't fit anymore. Crikey. Something needed to be done, like yesterday.
Thankfully, hubby agreed that drastic measures had to be taken. Unfortunately, his first drastic measure was for me to go through
everything and purge. Disgruntled but agreeable, I did so and 5 trash bags later we were left with what actually needed to go back in the closet. After the clean out, here was our starting point:
Here's what I envisioned: bright white, a mini chandelier, shelves to the ceiling lined with beautiful boxes to house all of my folded items. I also wanted an ottoman in the middle with an island for my jewelry. What? A girl can dream. So, why do I have the best husband? Ever? Because he didn't tell me no, he didn't tell me it couldn't be done, he didn't laugh at me. He told me it could be done but we would have to all of the work ourselves and be creative. I love this man. Budget - his department. Creative - just turn me loose, brother.
We started by painting bright white:
We added a row of shelves (and by we I of course mean he):
And then it was my turn to make my boxes and here's what I did:
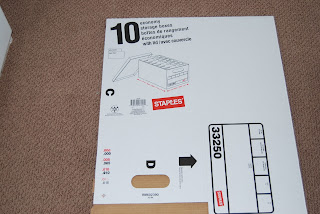 |
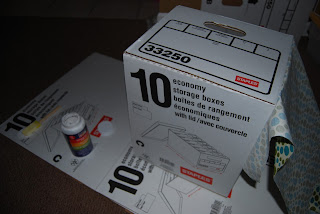
| Start with a cardboard file box - I bought a 10 pack at Staples. |
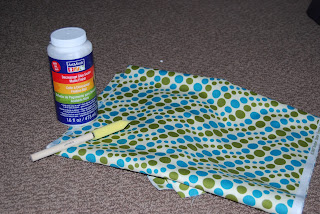 |
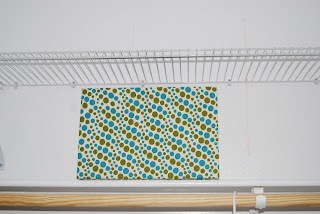
| Choose your material - I bought mine on clearance at Hobby Lobby. Get yourself some mod-podge and a brush. |
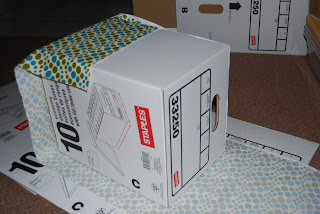 |
| Measure enough material to completely wrap around your box with a couple inches over hang on the top and bottom. |
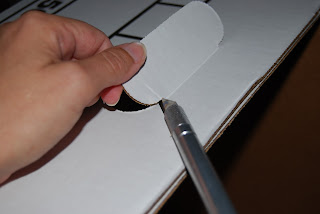 |
| Remove the handle tabs. |
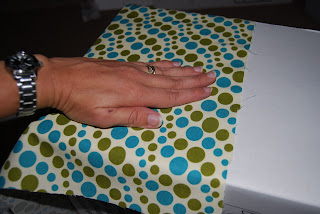 |
| Start on a long side of the box and pull the material to the mid-point. |
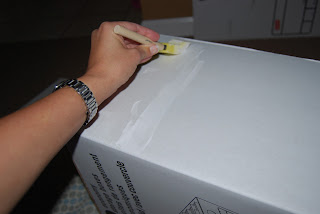 |
| Wipe on liberal amounts of mod-podge. Work quickly and in small areas as it does dry quickly. |
 |
| Continue to work around the box, smoothing the material and pulling tight as you go. |
 |
| Always put mod-podge on top of the seams to keep them from fraying. |
 |
| Mod-podge the bottom by wrapping like you would a present. |
 |
| Snip the corners at the opening, mod-podge and fold in to the box.. |
 |
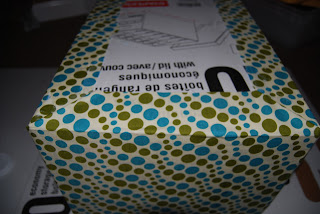
| Finished product: a decorative box to hide all of your closet clutter. |
|
|
I ended up making ten boxes. Each one only took about half an hour
and I spent less than $30 for all ten.
Our finished closet:
The homemade decor also continued with a small project in the living room. Needing something for a big bare wall,
and having seen this in a MaryJane's Farm Magazine,
and loving books as I do, here is what I made:
 |
| It's simply old book pages, folded into cones and secured to a wire floral wreath. | |
|
| |
It feels good to finish projects and I do believe I love my closet even more because I had a hand in creating it. I think I'll tackle some more of these projects. Goodness knows I've enough ideas on my Pinterest boards to keep me busy at least until the new season of Doc Martin hits Netflix.
In His Service,


